Designers: Cassie Meeker, Lindsay Sullivan, Matthew Schneider, Joseph Shim
Client Coordinators: Van Hatchell and Paige Morrow at Extraordinary Ventures
INTRODUCTION
Our client, Bob, is a man living with autism spectrum disorder. Autism is a broad term used to describe a neurological development disorder characterized by poor communication skills and repetitive behavior [1]. Bob is high functioning, able to complete tasks and follow directions. However, he has a short attention span and trouble with fine motor skills. Bob is employed at Extraordinary Ventures in Chapel Hill, North Carolina. This is a non-profit organization which seeks to employ young adults with developmental disabilities. It consists of self-sustaining businesses, including EV Gifts, which produces and sells candles.
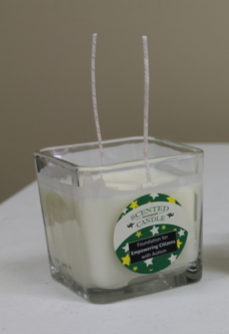
Figure 1: The finished candle
The candles are square in shape and occupy a glass container. Each candle is scented and has two wicks (see Figure 1). Bob currently has a method to make these candles but requires assistance from his job coach because he is easily distracted.
The process consists of four steps and each one presents challenges to Bob:
- Scoop one cupful of wax flakes to be heated; this is the precise amount needed to make one candle with the desired wax height. Bob pays little attention to whether the wax falls slightly above or below the cup line. This can result in inconsistencies in wax height between the candles.
- Stir the scent into heated wax. The boiling wax splashes and, as a result, Bob stops doing this task without thoroughly stirring in the scent.
- Tape the wicks to the bottom of the candle holder. It is difficult for Bob to place the wicks in the correct locations.
- Hold the wicks vertically while the wax cools and hardens, so that they go straight up through the wax. Straight wicks are essential so that the candles burn evenly and look symmetrical. If it is not done correctly, the candles have to be thrown away. The current method involves using clothespins balanced on the edge of the container. Because of Bob’s limitations in fine motor skills, this method is not precise and can lead to crooked wicks.
Currently, Bob uses a plastic cup to measure the amount of wax flakes needed for a single candle. He has no existing safety measure for when he stirs the scent into the wax. To determine the correct wick placement on the bottom of the candleholder, Bob places the candleholder on a template made of a Tupperware lid with black circles drawn on the bottom. Bob holds the wicks upright by clothespins balanced on the edge of the glass container. His current process is not accurate, durable, or elegant. Therefore, Bob needs a method to consistently produce high quality candles.
Since Bob lives with autism spectrum disorder, solutions to his workplace needs must be simple enough that he can use them autonomously. Our goal is to increase Bob’s efficiency and to give him more independence.
TECHNICAL DESCRIPTION
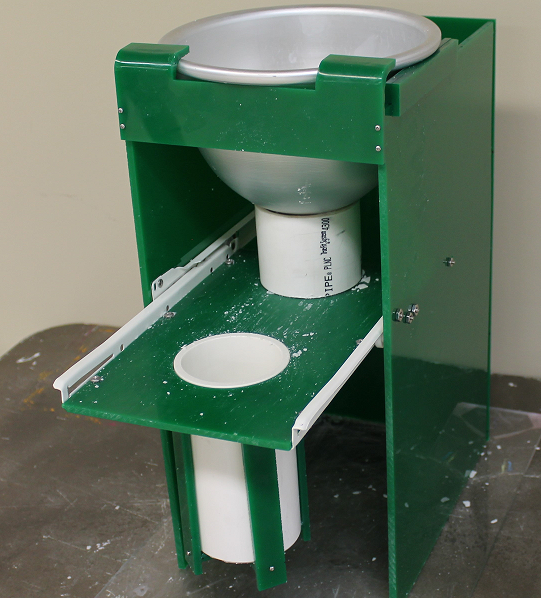
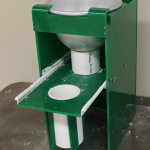
Figure 2: Wax dispenser
The improvements we made on the candle-making process consist of four different devices, each addressing a different need. The devices are: a dispenser, a lid, a base template, and a wick holder. Each part will be used at separate times during the candle making process. The dispenser fills a cup with wax flakes. When you slide the cup out to retrieve the wax, the wax is automatically leveled and the volume in the cup is standardized. The lid covers the pitcher of wax as it’s melting to prevent the wax from splashing up. The base template shows our client where to tape the wicks in the glass container before he pours in the wax. The wick holder is attached to the side of the glass container and when clipped onto the wicks, holds them straight up while the wax cools and solidifies overnight.
- Wax Dispenser
The dispenser is made of two parts, the hopper and the container. The hopper is a large aluminum funnel that the user fills with wax flakes. Flush with the bottom of the funnel is a sliding drawer with an encapsulated cup. The cup is the appropriate size to hold enough wax flakes to make one candle. When the drawer is pushed in, the cup is directly under the funnel and the wax will then fall through the funnel until the cup is full. Then, the user pulls out the sliding drawer and cup. As the mechanism slides out, the bottom of the funnel is closed off by the sliding drawer, so no more wax comes out (Figure 2). The user can then remove the cup to pour out the wax flakes into a pot to start the heating process. The dispenser enables our client to use the appropriate amount of wax for each candle.
- Stirring Lid
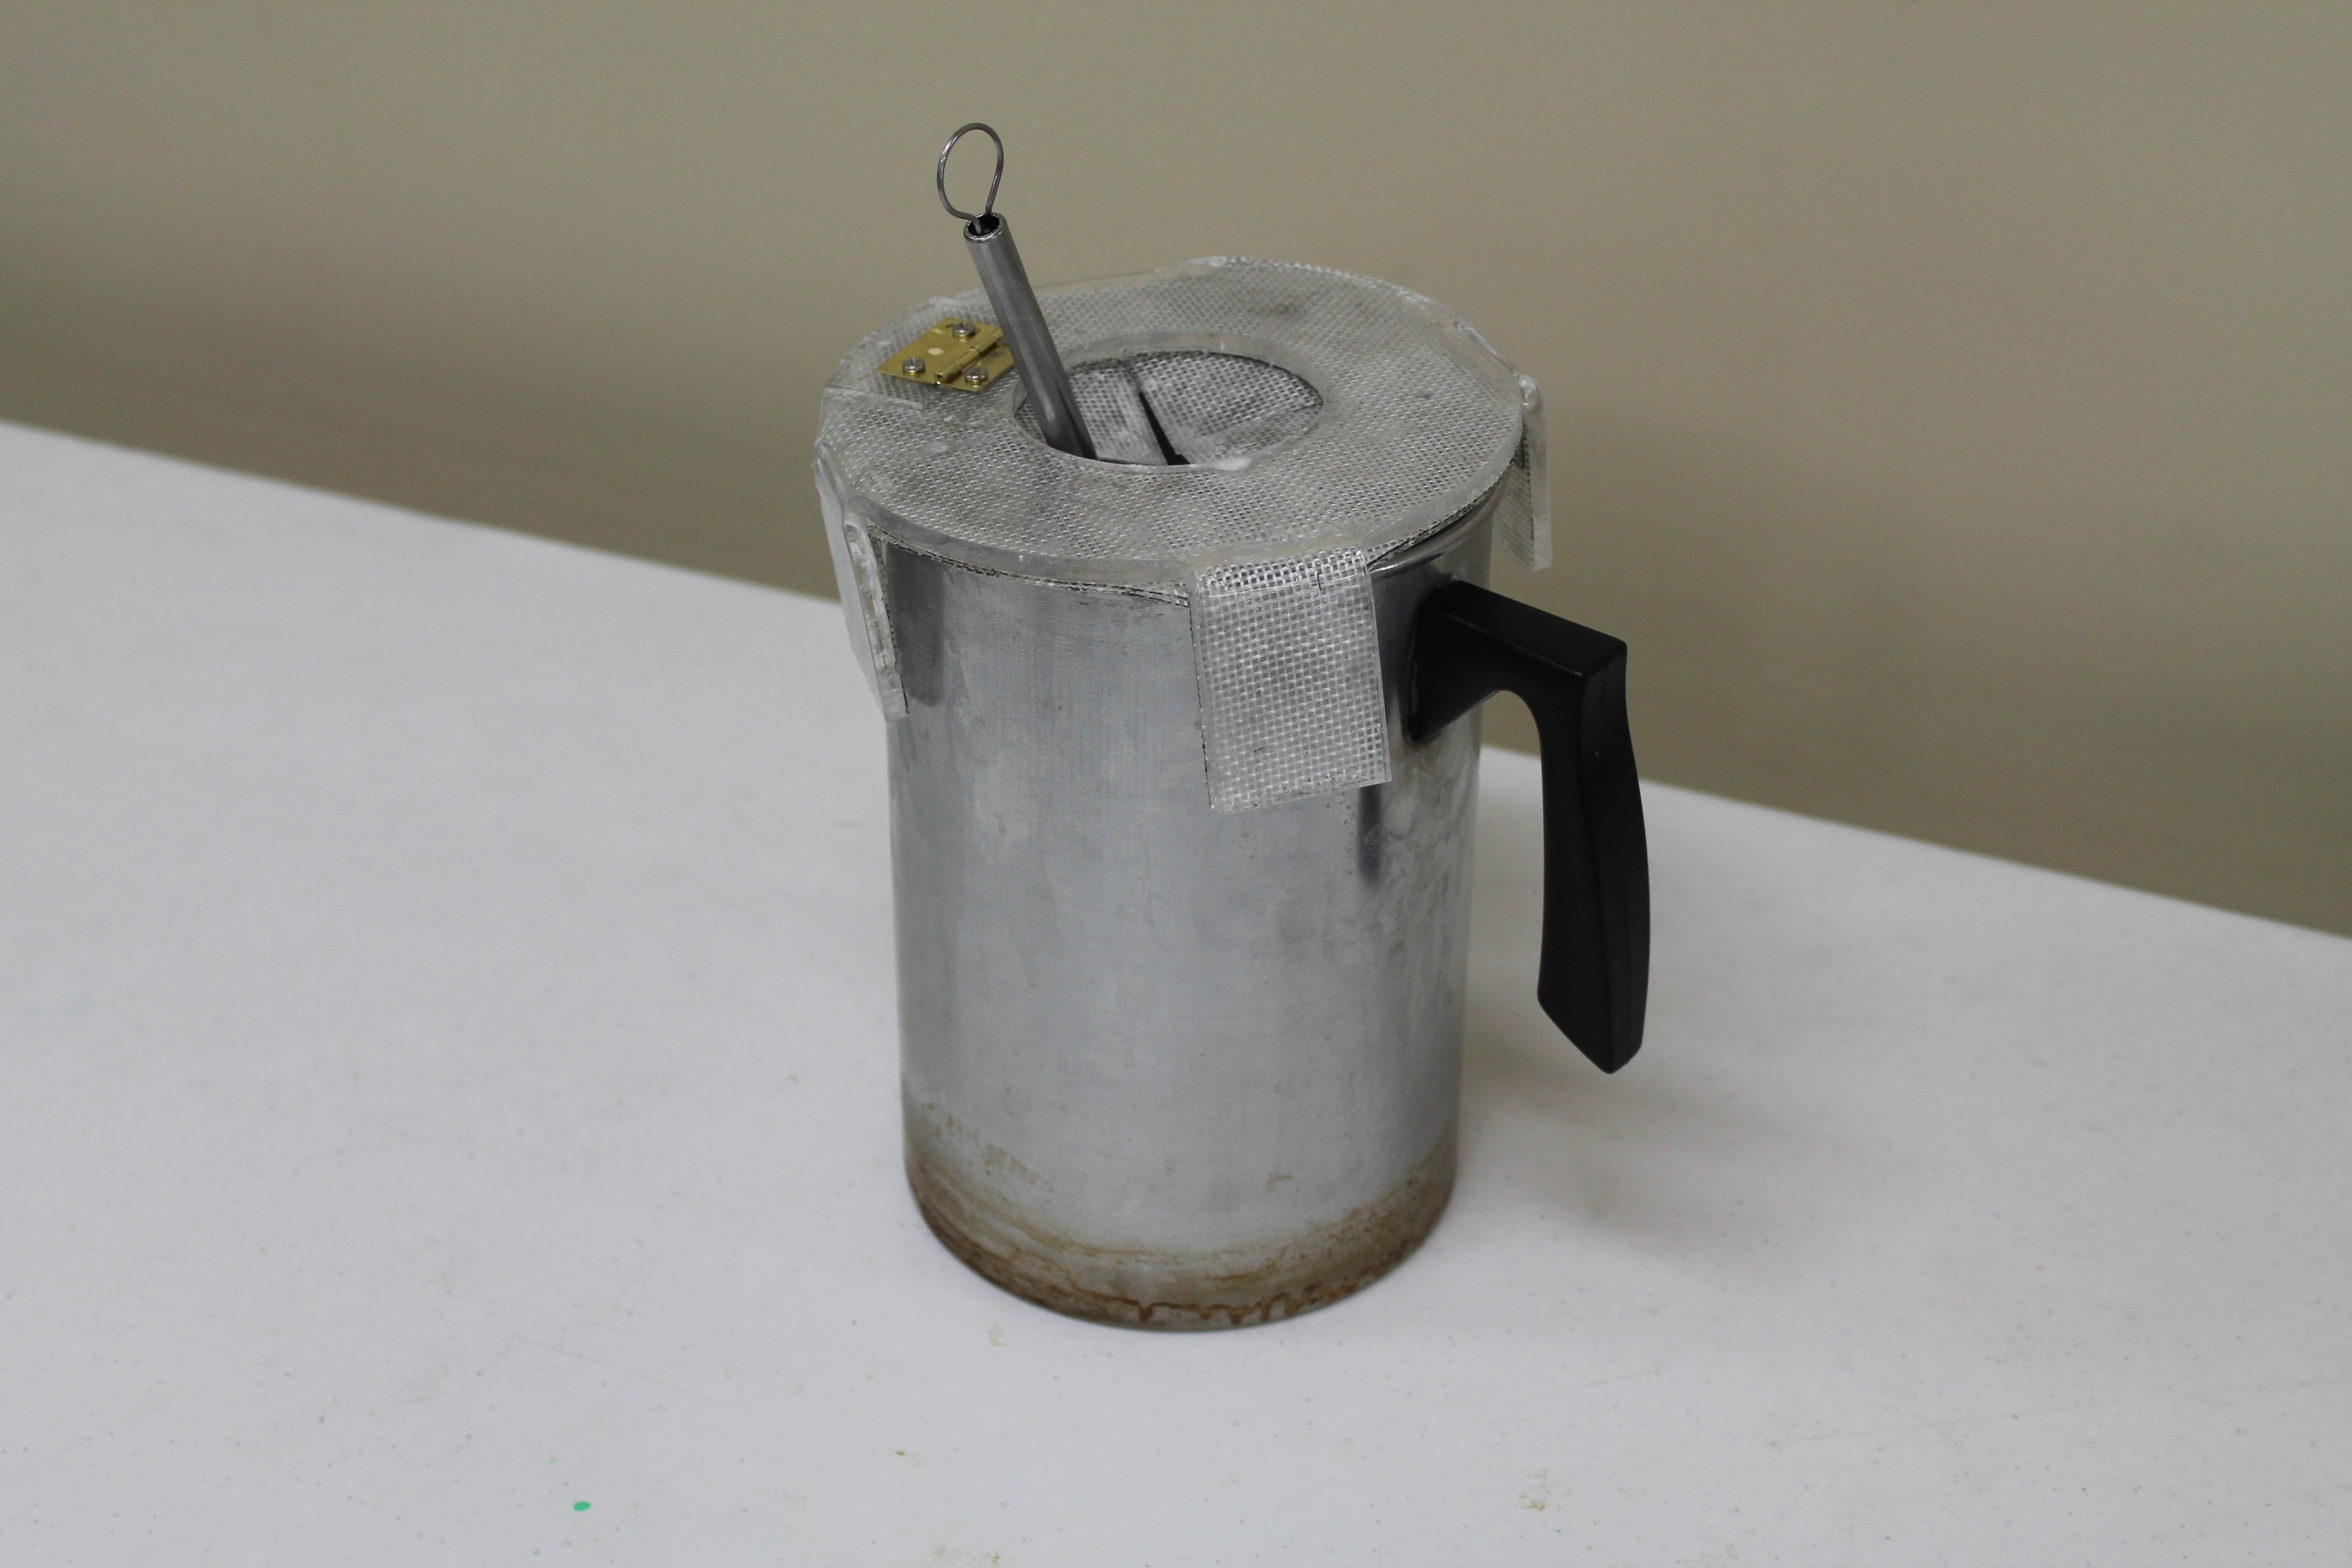
Figure 3: The stirring lid
The major function of the protective lid/stirring device is to prevent our client from being splashed by hot wax while he stirs the scent into the hot wax. The lid covers the pitcher that contains melting wax. It is made of one piece of acrylic cut into a circle, with flaps extending from the main circle. The flaps are bent to fit over the edges of the container where the wax is melted to hold the lid in place. The acrylic is covered in silicone, which insulates the lid from heat (Figure 3).There is a hole in the top of the lid where the stirring device can be placed and easily maneuvered. In addition, a small square of acrylic on top of the lid is attached to a hinge, so that it can be opened and closed. The client opens this maneuverable flap to pour in scents or measure the temperature.
- Base plate
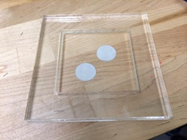
Figure 4: The base plate
The base plate serves as a template to guide our client in properly taping the bottom of the candle wicks to the bottom of the glass candle holder. The top piece of acrylic has a square cutout that equal to the size as the candle holder, so that the client can accurately place the candle holder onto the template every time (Figure 4). On the bottom piece of acrylic, there are two circles engraved at an equal distance from diagonal corners. The client places the wicks directly on top of the marked circles and then tapes the wicks in place. Once the wicks are in place, the candle holder can be removed from the base plate.
- Wickholder

Figure 5: The wick holder
The wick straightening device allows each candle wick to remain vertical while the wax is cooling and solidifying. The device mounts to the rim of the candle holder on two sides. Directly above the wicks, there are clips attached to an acrylic “u” shape (Figure 5). After the client pours the wax into the holder, he attaches each wick to the appropriate clip and leaves the candle to cool and harden overnight. We made twenty-one of these devices because Bob makes the candles in batches of, on average, 16 candles, and the wicks need to be held in place overnight while they cool. We wanted to ensure he would have enough wickholding devices to fulfill the candle orders he receives.
University Operator: (919) 962-2211 | © 2024 The University of North Carolina at Chapel Hill |